Customize PySM models
There are 3 straightforward ways to customize PySM models.
First we can still keep the same algorithms used to generate the components and just provide different templates/parameters. We can achieve this either using configuration files or, for more flexibility, by working directly with the component Python object.
If we need to implement different algorithms, we can implement a subclass of pysm3.Model.
Use a configuration file
The PySM models are implemented as classes and are then configured with input parameters in `presets.cfg <https://github.com/galsci/pysm/blob/main/pysm3/data/presets.cfg>`__, the same facilities used to load that configuration file and create the component object can be leverage by creating our own cfg file, for example here we are using a scalar value for map_mbb_index instead of using the template map provided in the d1 model. But we could as well replace the maps with our own
custom maps.
The %%file magic creates a file with the content of the cell
[2]:
from pathlib import Path

Path("mydust.cfg").write_text(
    """[dustfixedspec]
class = "ModifiedBlackBody"
map_I = "pysm_2/dust_t_new.fits"
map_Q = "pysm_2/dust_q_new.fits"
map_U = "pysm_2/dust_u_new.fits"
unit_I = "uK_RJ"
unit_Q = "uK_RJ"
unit_U = "uK_RJ"
map_mbb_index = 1.5
map_mbb_temperature = "pysm_2/dust_temp.fits"
unit_mbb_temperature = "K"
freq_ref_I = "545 GHz"
freq_ref_P = "353 GHz"
"""
)
Overwriting mydust.cfg
[3]:
sky_mydust = pysm3.Sky(nside=128, component_config="mydust.cfg")
[4]:
sky_d1 = pysm3.Sky(nside=128, preset_strings=["d1"])
[5]:
map_100GHz_mydust = sky_mydust.get_emission(100 * u.GHz)
[6]:
map_100GHz_d1 = sky_d1.get_emission(100 * u.GHz)
[7]:
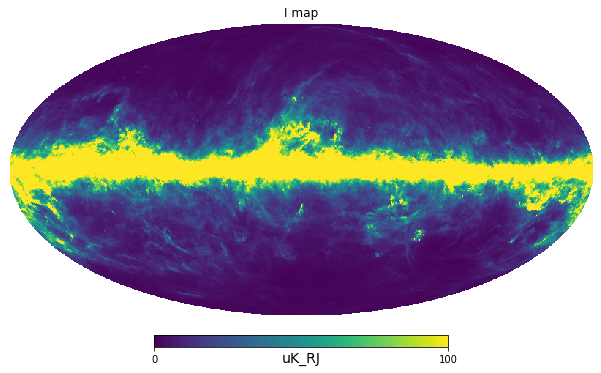
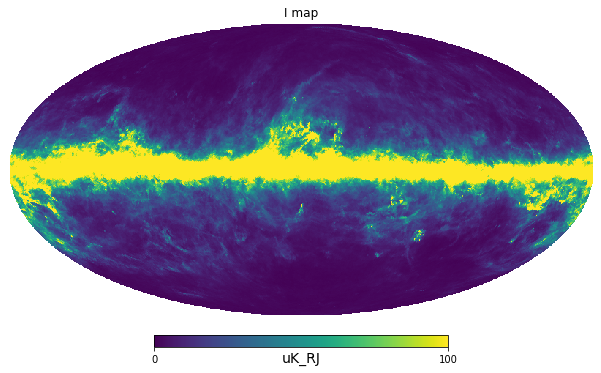
hp.mollview(map_100GHz_mydust[0], min=0, max=100, title="I map", unit=map_100GHz_d1.unit)
hp.mollview(map_100GHz_d1[0], min=0, max=100, title="I map", unit=map_100GHz_d1.unit)
[8]:
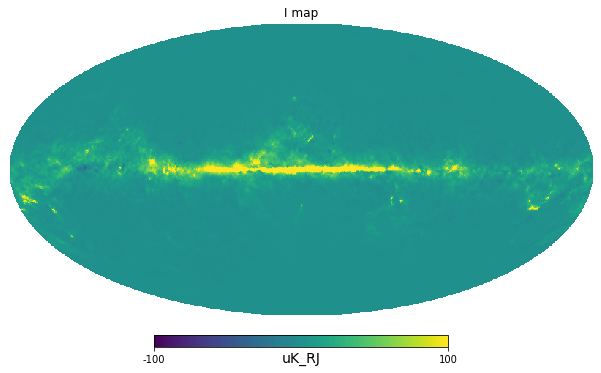
hp.mollview(map_100GHz_mydust[0] - map_100GHz_d1[0], min=-100, max=100, title="I map", unit=map_100GHz_d1.unit)
Work with the component class
We have more flexibility if we use the component class itself, we can create an instance and we can provide different input parameters and that is equivalent of using a configuration file.
But we can also create the class and then modify in place the class attributes, see an example below:
[9]:
dust = pysm3.ModifiedBlackBody(
    nside = 128,
    map_I = "pysm_2/dust_t_new.fits",
    map_Q = "pysm_2/dust_q_new.fits",
    map_U = "pysm_2/dust_u_new.fits",
    unit_I = "uK_RJ",
    unit_Q = "uK_RJ",
    unit_U = "uK_RJ",
    map_mbb_index = "pysm_2/dust_beta.fits",
    map_mbb_temperature = "pysm_2/dust_temp.fits",
    unit_mbb_temperature = "K",
    freq_ref_I = "545 GHz",
    freq_ref_P = "353 GHz"
)
[10]:
dust.mbb_temperature *= .8
[11]:
map_100GHz_mydust = dust.get_emission(100 * u.GHz)
[12]:
sky_d1 = pysm3.Sky(nside = 128, preset_strings=["d1"])
[13]:
map_100GHz_d1 = sky_d1.get_emission(100 * u.GHz)
[14]:
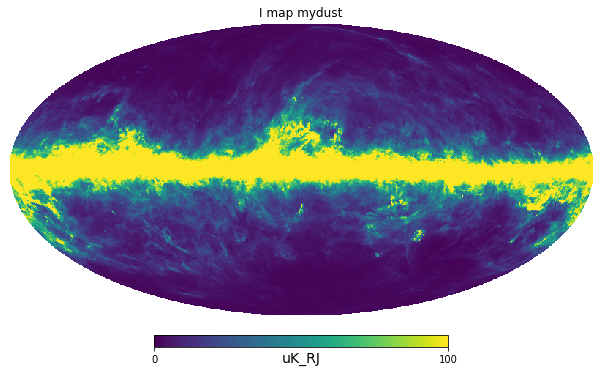
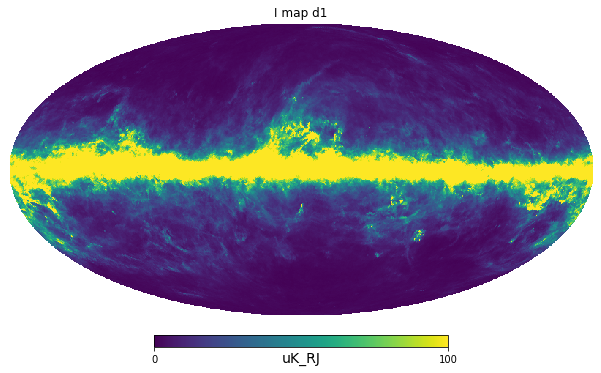
hp.mollview(map_100GHz_mydust[0], min=0, max=100, title="I map mydust", unit=map_100GHz_d1.unit)
hp.mollview(map_100GHz_d1[0], min=0, max=100, title="I map d1", unit=map_100GHz_d1.unit)
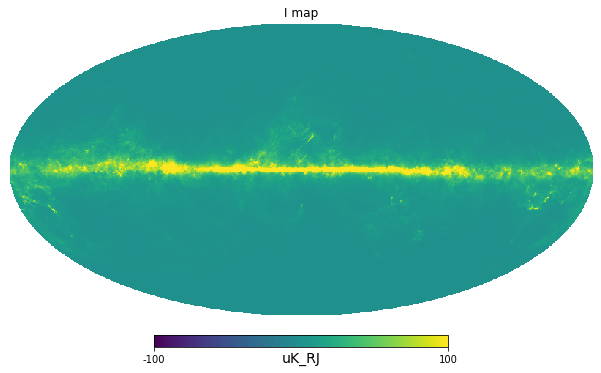
[15]:
hp.mollview(map_100GHz_mydust[0] - map_100GHz_d1[0], min=-100, max=100, title="I map", unit=map_100GHz_d1.unit)
## Implement a subclass of pysm3.Model
In order to implement your own model, subclass pysm3.Model and implement the get_emission method which gets an array of frequency freqs and a bandpass weights and performs the computation and bandpass integration and returns the output in uK_RJ.
If we want to reuse some of the algorithms implemented in one of the PySM classes, it is possible to directly subclass one of those instead of starting from pysm3.Model.
[17]:
class Monopole(pysm3.Model):
    def __init__(self, nside, value, map_dist=None):
        super().__init__(nside=nside, map_dist=map_dist)
        self.value = value << u.uK_RJ
    def get_emission(self, freqs, weights=None):
        return np.ones((3, hp.nside2npix(self.nside))) * self.value
[18]:
monopole = Monopole(nside=128, value=1*u.mK_RJ)
[19]:
monopole.get_emission(10 * u.GHz)
[19]:
[20]:
sky = pysm3.Sky(nside=128, preset_strings=["d1"], component_objects=[monopole])
[21]:
sky.get_emission(100 * u.GHz)[0, :3]
[21]:
For performance better use numba to make use of all cores on the machine and execute at compiled code speed, for example:
https://github.com/galsci/pysm/blob/main/pysm3/models/power_law.py
[ ]: